Sunday, 27 October 2013

Apple and Blackberry Crumble

Time for something seasonal! I considered at the beginning ordering my blog posts by season, so you could just look down the months for what you want, but a few problems were presented: predominately, there were so many recipes I wanted to get down that I couldn't be bothered to wait, and secondly many recipes didn't have a seasonal value: when do you traditionally eat banoffee pie? When are bananas in season in the UK? Er, never, so it didn't really matter. That being said, I would like to theme my December posts on Christmas (ideas already brewing) and I thought so many UK fruits are in season in Autumn, so it would be good to use such ingredients - and, after all, what's better than cooking food you've grown yourself? (Cheesy? Cliché? Meh.) This crumble uses apple and blackberries, both very well suited to our climate and in season now, but of course many other fruits can be used too.

Apple and Blackberry Crumble
Prep time: 30 mins
Serves: 4
Cooking temp: Gas 4, 180C
Cooking time: 30-35 mins

Ingredients
385g cooking apples
315g blackberries
75g caster sugar
75g butter (room temperature)
75g caster sugar (again)
50g porridge oats
100g plain white flour

Method
  1. Preheat the oven.
  2. Peel, core and slice the apple into fairly thick slices.
  3. Line a baking dish with the apple and evenly distribute the blackberries over the top.

     
  4. Sprinkle over 75g of sugar, and stir slightly in.
  5. Mix flour and butter together and rub with your fingers into coarse crumbs.


  6. Add the sugar and the oats, and rub together to form finer crumbs.


  7. Sprinkle over the apple and blackberries, covering it totally.

  8. Cook for 30-35 mins, until the crumble is golden and the fruit begins to bubble up around the edges.
Alternatives....
Not so seasonal, but try -
700g of rhubarb (chopped into 2cm pieces)
700g of plums, halved and stoned (almost in season)

adding 1tsp of orange marmalade
adding 1tsp of whisky
using muesli instead of oats (you will have even MORE fruit!)

Sunday, 13 October 2013

Rocky Roads

OK, so I always knew this was easy to make, but I didn't really know it was this easy. Basically, you can put in just about whatever you want to, so I thought I'd put down the essentials and list a few interesting ideas you might like to try. These are great for a number of reasons, 1. very easy, 2. very tasty, and 3. a great way to use up marshmallows if you accidently brought too many for making fudge...

Rocky Road Bars
Prep time: 20 mins plus 2 hours chilling time
Serves: It really depends on how big you cut the slices (Mine made 24)

Ingridents
200g plain chocolate, 70% cocoa solids
3tbsp golden syrup
135g unsalted butter
100g mini marshmallows or large ones chopped up
200g digestive biscuits

Optional ingredients:
-raisins and other dried fruit
-honeycomb (e.g, use a crunch bar)
-nuts
-chocolate drops
-glace cherries
-chocolate bars, e.g. Mars bar - maybe just chuck in some celebrations, like Maltesers or Twix

Method


  1. Line a square baking tin with baking paper and set aside.
  2. Put the biscuits in  a freezer bag and whack with a rolling pin, until they have broken down into lumps- anything from dust to pebble-sized pieces. Set aside.
  3. Take a large saucepan and light a low heat. Melt the butter, golden syrup and chocolate together. You might want to do this with the pan-over-boiling-water technique rather than on  an open flame, as it stops the chocolate burning.

  4. Stir constantly until the chocolate has completely melted.
  5. Turn off the heat. Add the biscuits, marshmallows and anything else you care to eat into the chocolate mixture until it is all covered.
  6. Tip into the baking tray, right to the corners.
  7. Chill for a minimum of 2 hours in the fridge.
  8. Slice the chocolate into fingers and dust with sifted icing sugar to serve. I cut mine into 8 strips and each one into thirds.

Thursday, 10 October 2013

Fudge

Technically, this isn't really fudge. Not like the fudge you would buy, at any rate. Nevertheless it is very nice, and maybe slightly addictive. It reminds me of parties, as this recipe is a good one for such things: little pieces of pure sugary omnomness... (I'm not surprised that got a red underline) Anyway, bake away!
P.S. There are marshmallows in this recipe, but they aren't really that obvious in the fudge, so if you don't like them this might still be worth a shot.

Fudge
Prep time: 30 mins plus 4 hours chilling.
Serves: Makes 50 pieces, so about 25 people at a party or less if it is a dessert.

Ingredients
350g  icing sugar, sifted
75g unsalted butter
4 tsp milk
1/2 tsp vanilla essence
75g pink and white marshmallows (colour not compulsory.. but it lends a girly touch to the fudge :) )
sprinkles/ edible glitter to decorate
18cm square baking tin (or lots of little tubs, e.g. take-away tubs)

Method
  1. Line a baking tin with greaseproof paper, cut to size.
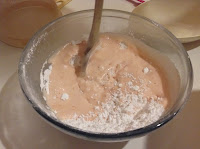
  2. Sift the icing sugar into a large bowl, to form a nice peak. Make a hollow in the top with a spoon. Set aside.
  3. Put butter, milk and vanilla essence into a small pan. Taking a pair of kitchen scissors, cut the marshmallows in two and add them to the pan. Alternatively, rip them or buy the mini variety.
     
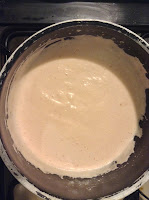
  4. Heat very gently and stir with a wooden spoon until it has completely melted into a pink sugary soup. Mmm.
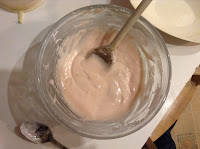
  5. Pour the warm mixture into the icing and stir in quickly, until everything has formed a smooth mixture.

  6. Pour the fudge into the baking tin/tubs and flatten down with a spoon to form a nice smooth top.


  7. Sprinkle over the sprinkles, and press in with your fingers. Let the fudge cool.
  8. Chill for two hours, away from strong-smelling foods.
  9. Loosen the edges of the fudge with a blunt knife and turn it out onto a board. Remove the greaseproof paper.
  10. Turn the fudge over and cut into squares. (Difficult- it is sticky!) Chill for another two hours in an airtight container.
    The fudge keeps for a week in the fridge.