So - you want proof that you don't need to be an arts and craft genius to make nice handmade cards? Look no further...
I made these two for my mum and sister. They take a few hours each (or at least for me, who's terrible with a scalpel) but the end result is very rewarding. Brilliant idea to give to a close friend of family member :)
Idea 1: Christmas baubles
You will need:
1 A4 sheet of stiff card of your chosen colour scheme
(mine was blue and silver, other combinations that work well could be silver and gold; red; red and white; red and green... basically anything Christmassy. Or just, any colours that look good together)
A few sheets of white card
Ruler and set square
A round object of about 6.5 cm diameter / compass
Craft scissors
Glue (Pritt Stick and PVA)
Three designs of wrapping paper or decorative paper that go together in a colour scheme
Silver pen (fine tip and a thicker one)
Silver/Christmas themed ribbon
Small foam craft pads
Quilling paper in lustrous colours or your colour scheme
Quilling tool or cocktail stick
(I think that's everything!)
- Fold the coloured card in half (short edges together) to make a portrait card
- Cut out a rectangle of white card that is about 2cm smaller in width and length (to give you a 1cm edging all the way around). Glue it to the middle of the front of the card.
- Repeat on the inside page(/s depending on how much you plan to write...)
- Draw around a circular object (I used the bottom of the PVA glue tub) onto the white card and repeat twice more. 5-7cm diameter is a good size.
- Roughly cut out the shapes. On the side without the pencil markings, glue a piece of wrapping paper (decorated side up, of course) to cover the piece of card. Smooth out any crinkles or blobs of glue. (NOTE: If you use decorated card, not wrapping paper, you may not need to bother backing it with white card; draw the circles directly onto the 'wrong' side of the paper)
- Cut out the baubles carefully and arrange on the page.
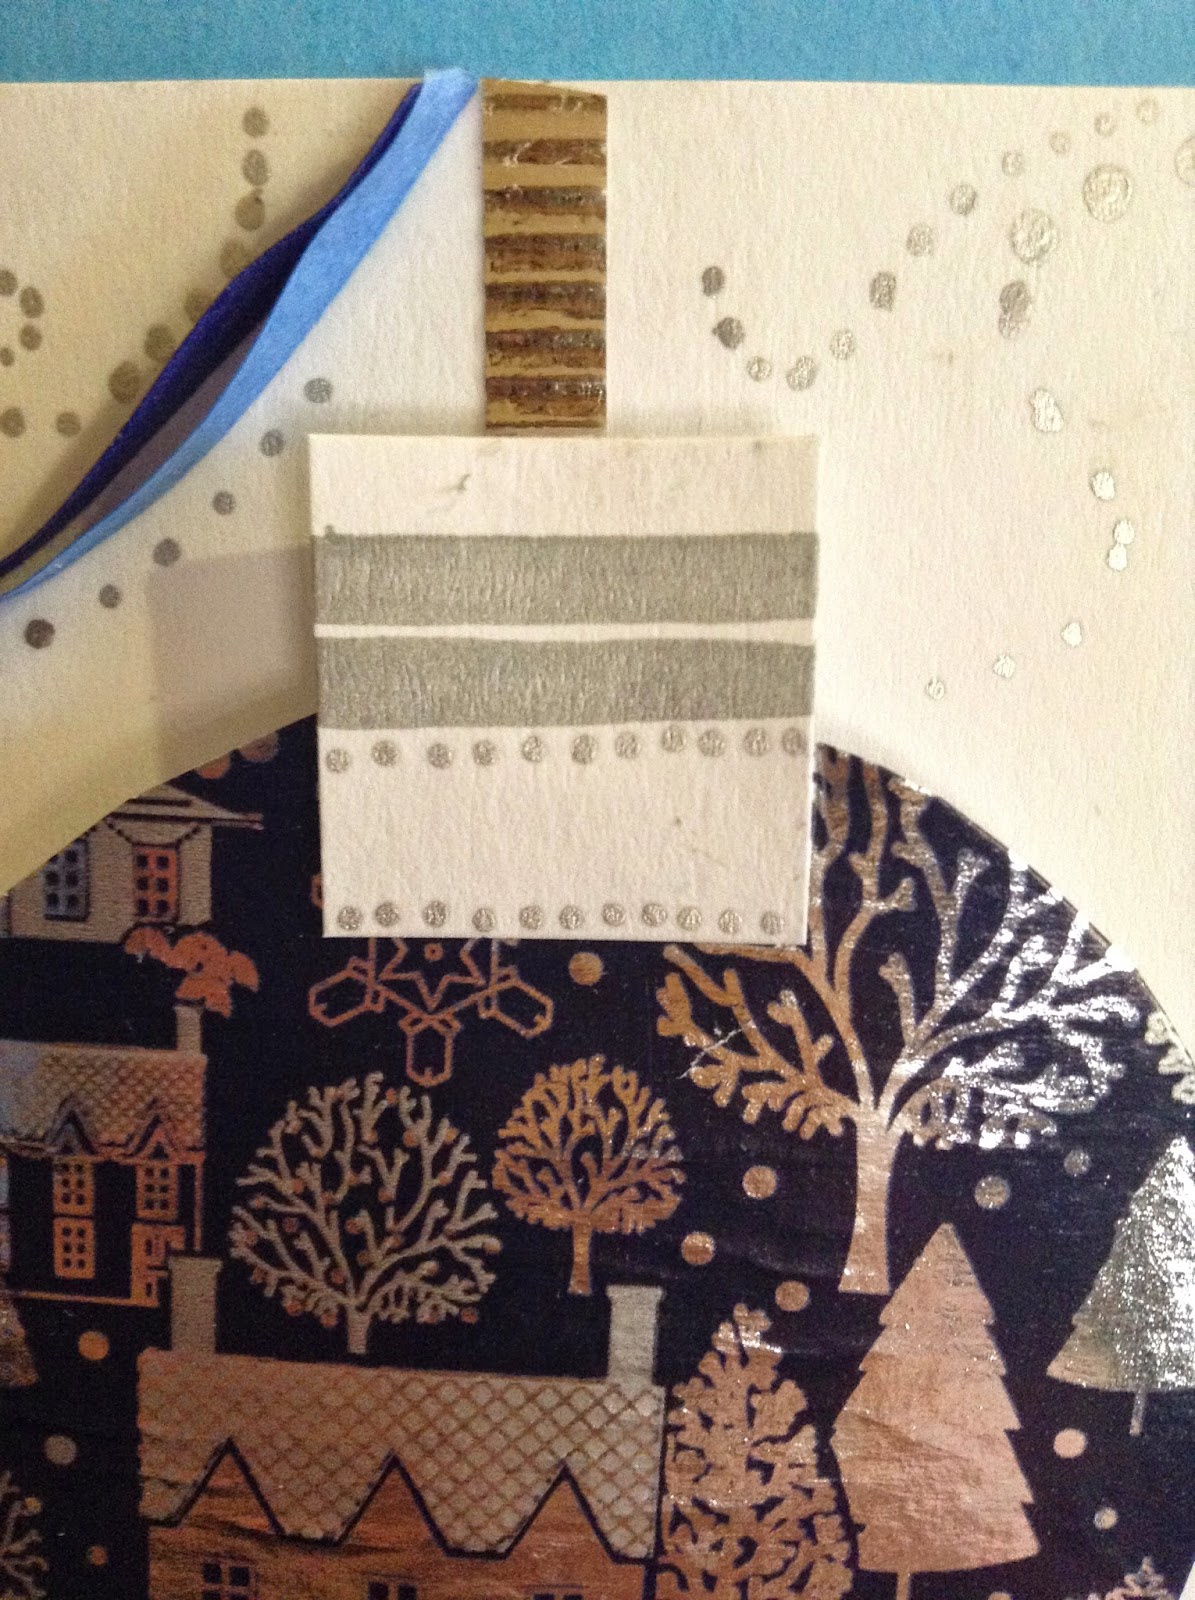
- In the same white card, cut out three 2cm x 2cm squares. Decorate with the silver pen - a simple design such as a few stripes across, and some dots around the edging.
- Glue one to the top of each circle, so they are half on.
- Once you are happy with the positions of the baubles, trace round them lightly onto the card. Then, cut three lengths of ribbon, long enough to extend from the top of the card (one of mine came out from below the bauble above, see image) to the outline of the bauble. Glue them down.
- Back the baubles with mini craft foam pads (I did eight around the edges, though you may want to put some in the middle too) and stick firmly to the page. Make sure that the ends of the ribbon aren't visible.
- Add some quilled designs (vague, i know... sorry). You can make your own quilling paper by cutting coloured paper into 3mm strips. Roll one end around a cocktail stick/quilling tool, then slide off the end. You can allow it to unravel slightly or glue it in place as a tight curl. Use PVA glue on the end of a small paintbrush to glue them down.
- Finish with dots of silver along the lines of the quilled paper, and of course your "Merry Christmas" or "Season's Greetings".
 |
| The card before the silver pen addition (step 11) |
Idea 2: Merry Christmas Window
You will need:
1 sheet A4 white card
Pencil
Ruler (preferably metal) and set square
Scalpel
Glue
Red decorative paper or wrapping paper
Scissors
Extra white card
Silver writing pen (fine tip)
For the owl:
Pencil
White card
Red card (of the same stiffness, thickness etc)
Black card (ditto)
Scissors
Glue
Gold pen or paper
- Fold the white card in half to make a portrait card. On the front, mark half way up, and rule a straight line across. Make another line a third of the page above this (i.e 7cm)
- Divide up the gap into 5: happily, an A4 sheet folds into roughly 15cm across so that should give you intersections of 3cm.
- Sketch the letters of MERRY, ensuring that they are always connected to the paper above and below (see image). Also make sure that there is a space between each letter (Mine was 2mm). For ease of cutting, shade in the area that will be removed. You may want to use a ruler to draw the edges of straight letters (I didn't go as far as to measure the internal angles of the 'M' and the 'Y', but I imagine some would...)
- Using a craft scalpel, cut away the shaded areas, without cutting into the lettering you want to keep. Rub off all the pencil marks (be careful of erasing too vigorously over the fragile letters)
- Glue a square of red paper or wrapping paper in the half below, aligning the top edge with the very bottom of the letters so there is no white space between. I cut my piece slightly larger and then trimmed around the edges when it was stuck on.
- Add the word "Christmas" (or it wouldn't make sense otherwise ;p ) in a white box just below. I used silver pen, you could go to the effort of cutting out this lettering too but then again...
For the owl:
- Draw out a rough egg shape onto a sheet of white card, about 5cm longways. Cut it out.
- Trace around the shape onto red card. Then, draw in the wings and ear(s), not forgetting the nose in the middle. Cut this out.
- Cut out two largish circles in white card, large enough for cute eyes but not too massive... then, cut out two black circles of a slightly smaller diameter. Keep two tiny offcuts of white as the glints in the eye.
- For the belt, cut a thin strip of black card. You want the ends to be tucked under the wings, so you may want to mark out their position first. For the buckle, cut out a tiny rectangle slightly thicker than the belt in white/gold card, and remove a smaller square from the inside using a scalpel. Colour it in gold if you used white card.
- Sketch out a rounded rectangle, just larger than the width of one ear, on white card. Cut out a red triangle with a base that is slightly smaller than the length of the white piece. Finally, another white circle for the bobble.
- Phew. You should have something like:
- Assemble the pieces, beginning with the belt and buckle, then the wing section and eyes and finally the Santa's hat (it should be pretty obvious how it goes together)
- D'aww. You can stick him inside the card or on the outside, or as the focal point of a completely different card design.
An alternative or extra design is to stick another image in the area behind the 'Merry', so it can be viewed through the lettering; such as a winter scene.
Hope you like them :)


