I made these for Valentine's Day - though of course, you can have cake pops for any occasion... their speciality lies in the decoration ;) . As American cakes, the typical coating is 'candy melts', which are basically chocolate. You can buy the moulds
here or at cake craft shops (like the amazing AJ Farmers, for anyone who lives in the vicinity... :D )
The reason I refer to them as 'healthier' is as the traditional cake pop is more like cake crumbs rolled up in cream cheese and condensed into a ball (just as delicious, by the way) whereas this lighter version involved baking the cakes as mini pops already. Cute!!!
Cake Pops
Prep time: 40 minutes
Serves: 12 (though that should be more like 'makes', you're likely to eat more than 1!)
Cooking temp: Gas 4, 180C
Cooking time: 20 minutes
Ingredients
75g caster sugar
75g margarine
75g self-raising flour
2 eggs
Flavouring: such as 1 tsp vanilla extract, 20g cocoa powder (and 55g flour), ginger powder... anything you like, perhaps it could complement the coating such as raspberry cake with white chocolate or ginger with dark chocolate (though make sure you don't alter the consistency greatly)
A few drops of food colouring (optional)
For the coating:
Uhm.... this seems to be a bit choose-your-own. I would recommend melted chocolate or chocolate icing with a table spoon of golden syrup to make it shiny and stick better. Ideally you want the coating to be able to harden smoothly around the pops
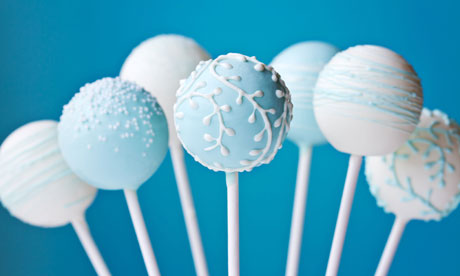
To decorate: anything you want, from sparkles and sprinkles to chocolate swirls.
You will also need: 12-hole cake pop silicone mould and sticks
Method
- Preheat your oven.
- In a small bowl, combine the margarine and sugar. If you are using a liquid flavour like vanilla, beat it in with the egg in a separate cup before adding. If you are flavouring with a dry ingredient, mix it to the flour and sift into the mixture.
- Add some colour, if using.
- Fill the bottom half of the cake pop moulds - without the hole(!) - to the top, and carefully place the second half on top. Place on a baking tray and bake for 20 minutes.
- Remove from the oven and leave to cool completely without lifting off the top (I stuck a stick through the little holes in the top to check that the cakes were cooked)
- Pop the cakes out of their moulds.
- Prepare your coating: I melted white chocolate over boiling water, then added the golden syrup. I also did some with cocoa powder icing + syrup! :D
- Dip the end of each stick in the coating and stick into the cake pops, leave to set in the fridge for an hour or so.
- Remelt the icing, dip each cake pop in and coat completely, down to the stick. Leave to solidify ideally on a cake pop stand.
- You can then decorate freely as you wish, depending on the occasion! Here are some (perhaps ambitious) suggestions: (Sorry, this website has a terrible adding pictures function)

 Copyright www.bakerella.com, www.theguardian.com, cakepopsideas.com - yes, a real website!!!


