NB: I am not associated with any external links from this page (DecraLed) however it is the website I use.
Stained Glass Window
Sheet of glass
3mm lead strip roll (oval or flat profile) Buy
Coloured adhesive film Buy
Boning peg Buy
Paper, pencils, pens
Sharp scissors/Craft knife
Tracing paper
Methlayted spirit/lighter fuel Buy
Squeegee Buy
Preparation
First, you'll need a design to lead. This can be from the internet or one you have made yourself: if you draw it yourself, make sure there aren't any fiddly, small lines as these will be hard to lead.
- Draw the design up, full size, onto a sheet of paper.

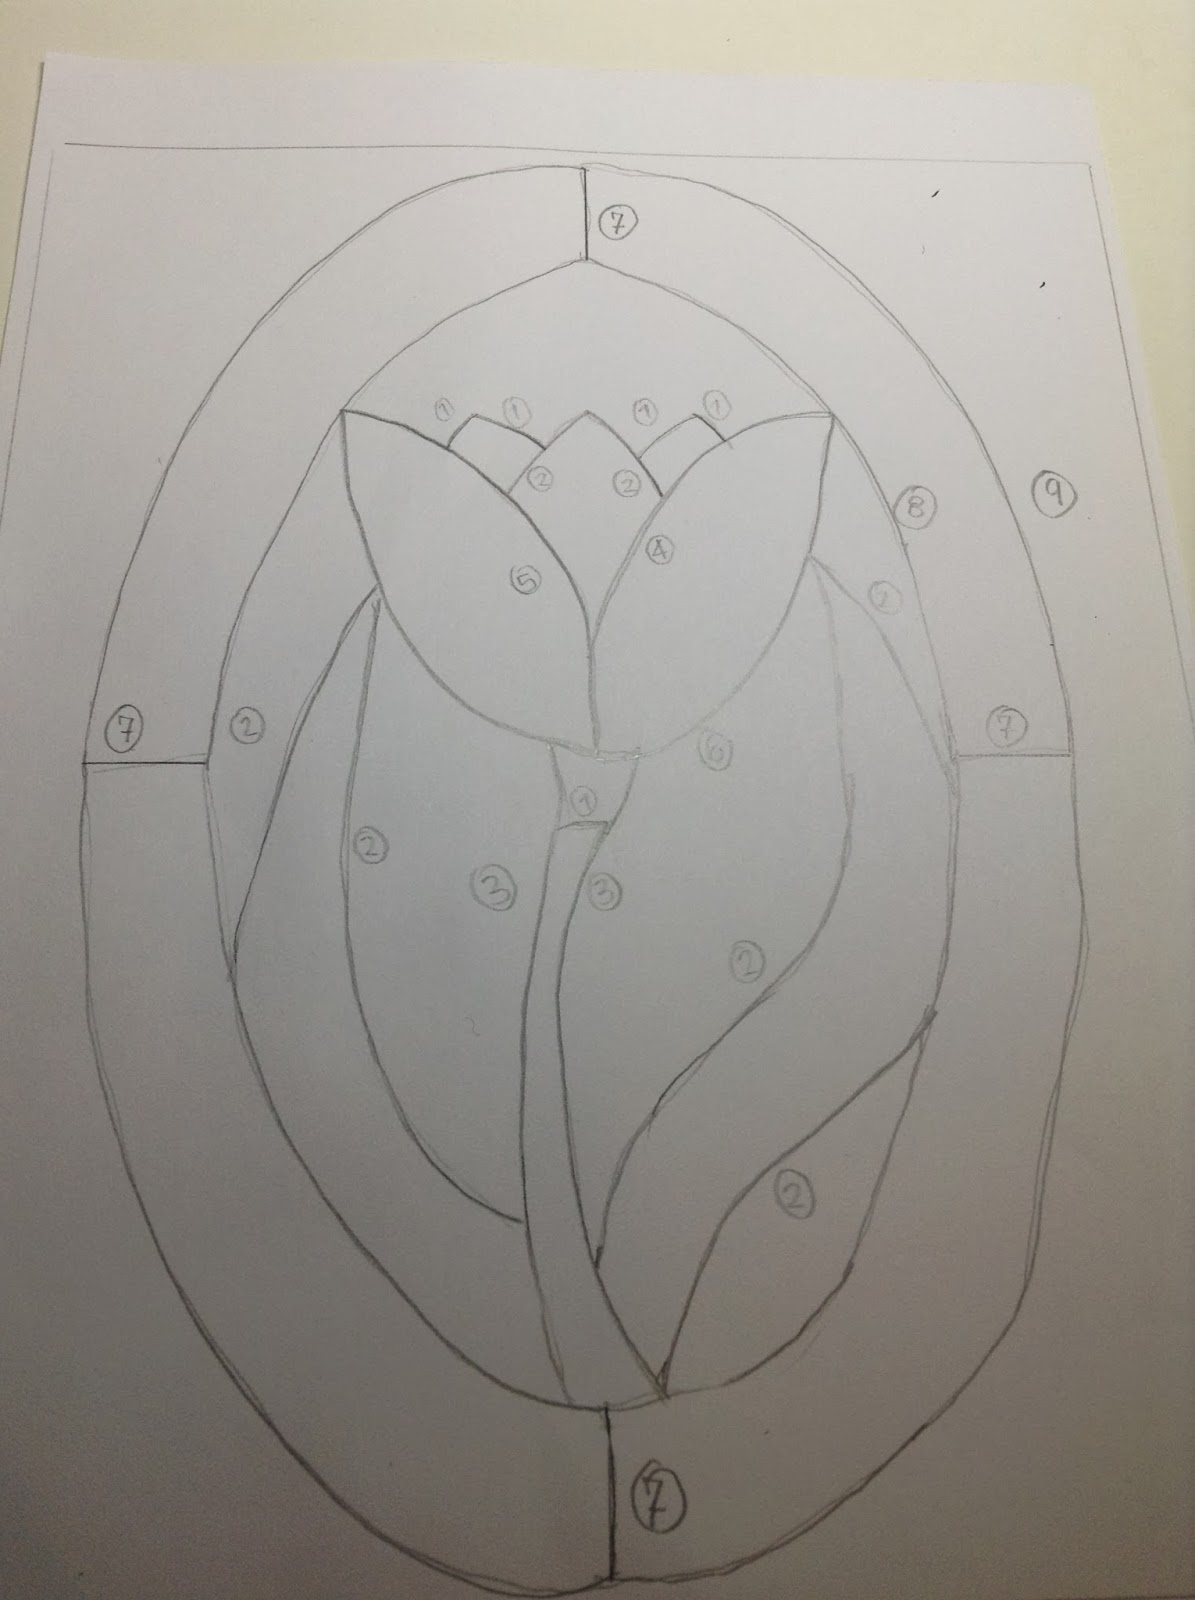
- When leading, you don't want 'butted' joins: that is, where the end of a piece of lead is showing. The ends should be tucked under other strips, therefore when leading you should apply the shortest bits first and end with the edging/longer lines (see diagram)
- Colour code your design to adhere to this (ie, make sure the outline is leaded last.) In my diagram, for example, the leaves (orange) need to be leaded before the outline (lilac) as the ends should be underneath.

- Colour in your design with the colours you will use. Experiment with different colour combinations.
Two methods of leading
Now, there are two things you can do. If you want only one side to be the end visible product (eg a placemat) then follow the first set. If you want the finished product to be viewed from both sides (eg a window pane) then follow set 2.
Set 1
- Hold the design up to the window and place your desired coloured film over the paper. Trace around the shapes where you want there to be that coloured film.
- Cut out the shapes with sharp scissors, around the outside of the penline.
- Repeat with all colours.
- Take your piece of glass and clean vigorously with alcohol or lighter fuel. Don't use window cleaner, as it leaves behind a soap layer to which the lead and film won't stick.
- Using double sided sticky tape, attach the paper design to the back of the glass. Arrange your shapes of coloured film over the glass.
- Peel of the back of the film and slowly position it on the glass. Using a squeegee or the back of your thumb, press out the air bubbles. Put on all the pieces of film. They should meet at the edges but not overlap. Leave at least an hour before leading.
- Follow step 2-4 of Set 2
Set 2
- Attach the design to the back of the glass

- Following your leading order, cut a piece of lead that is a bit longer than you need. Smooth the lead out between your thumb and forefinger. Peeling off the adhesive strip as you go, press the lead onto the glass, gently stretching it to fit the contours of your design. If you are reading this from set 1, make sure that you cannot see the edges of any film as you apply the lead (it should be under the strip). Cut off excess lead with scissors or a craft knife.
- Run along the length of the strip with the square end of the peg, pressing down firmly to ensure a tight bond. Then run the pointed side along the edge of the strip. This makes the bond watertight.

- Complete for the whole design, following the same process and making sure that all ends are tucked under other lengths of lead.


- If you are reading from Set 1, the leading should now be complete. Clean the glass again and it's done.
- If not... you should have something like the picture above. Turn over the glass and peel off the paper. Clean the other side.
- Take a piece of tracing paper and place over a section that you want to colour. Trace around the shape, keeping to the middle of the lead strip.
- Transfer onto the back of the film and cut out.
- Stick on all the pieces as in Set 1, making sure that the film remains within the boundaries of lead. Turn the glass over frequently to make sure you can't see the film poking out - if the shape is too big, use a craft knife to cut away some of the film. If it is too small (you can see a gap through the film from the other side) peel it off and start again or make sure you lead over the gap.

- Leave at least an hour before leading.
- Lead this side as with the other, following the lead strips exactly as they are on the other side. Turn over to make sure that the lead is properly lined up.
- The piece is now finished, and presentable from both sides! Attach to a window or a similar place.

The other side of this design will look identical - Now wash your hands thoroughly.
And in other news, here's a spherical candle I made:
 |
| Isn't it so cute?!? |
Really pretty design Louise. Next stop, Westminster Abbey
ReplyDeleteIn other news,
Aww, it's adorable!