I'll leave out all the cleaning out my room and sorting out rubbish bit, given it's probably as boring to read as it was to do, but here are some of the projects I embarked on:
Bedside cabinet and shelf


I wanted my room to be personal, so I thought it would be interesting to decorate the furniture myself. In order to make the furniture match with the colour of my room, I decided to use dark lilac and white for this (Exact colour: Dulux "Lilac Spring"). The walls and ceiling were the lighter shades of the same colour, so for continuation I used the darkest for stencilling. Other suggestions for a smart, contemporary look could be a steel grey for the design or even a light blue background with a white stencil (though I recommend you keep the background lighter than the design).
You will need:
Wooden furniture to decorate (I used a small bedside cabinet and my old bookshelf)
Screwdriver
Fine grade sandpaper and block
Medium-sized decorating brush
All-purpose primer
White (or your colour, above) matt vinyl emulsion or eggshell paint - I used over 2.5l in total
Tracing paper and carbon paper
Sharp pencil
Acrylic paint or sample emulsion pot in your chosen colour
Small artists' paintbrush
Clear varnish
(NB - These instructions are for a cabinet but they are pretty much the same for the shelf)
Preparation
First the wood must be prepared. I was working on to two different types: the shelf was old woodchip board and the cabinet untreated pine. Paint will adhere to various woods in different ways so ensure it is properly prepped (esp. if non-absorbent). I recommend that you do this outside - the paint and emulsion can smell, and the sawdust could get everywhere.
- Remove the drawer knobs and lightly sand down the body and drawers of the piece. Pull out the drawers and apply masking tape to the sides to stop paint splashing over them.


- Apply a coat of primer, working in the direction of the grain and ensuring no drips are left (when solid they're hard to remove). When dry (mine takes about 20 minutes) apply a second coat.


- After 4 hours, paint the body and the drawers with the white emulsion, but not the drawer sides - this could prevent them sliding easily.


- After the first coat, it's more than likely that the paintwork will look a bit patchy, with the wood still showing though - especially if it was originally a dark colour. When the first coat is dry (check the manufacturer's guidance for times) paint over a second coat, ensuring you are still painting with the grain and as straight as possible. This should be enough to get a good even coat but repeat if necessary. Remove the drawers.

One coat 
Two coats
- Now, for your design: floral patterns work quite well to create an elegant finished product, in particular blossoms or other Japanese-inspired designs. Other suggestions could be trees, flower heads (dandelions?) or birds such as owls, anything just so long as you can paint it and scale it to fit on your drawers. I made sure mine extended across the drawer face to keep the piece balanced.


- Once your design is the correct size, print it/cut it out and trace over it using a sharp pencil onto tracing paper. Transfer the design onto one drawer, holding it down with masking tape. This will give you a reverse of your design.
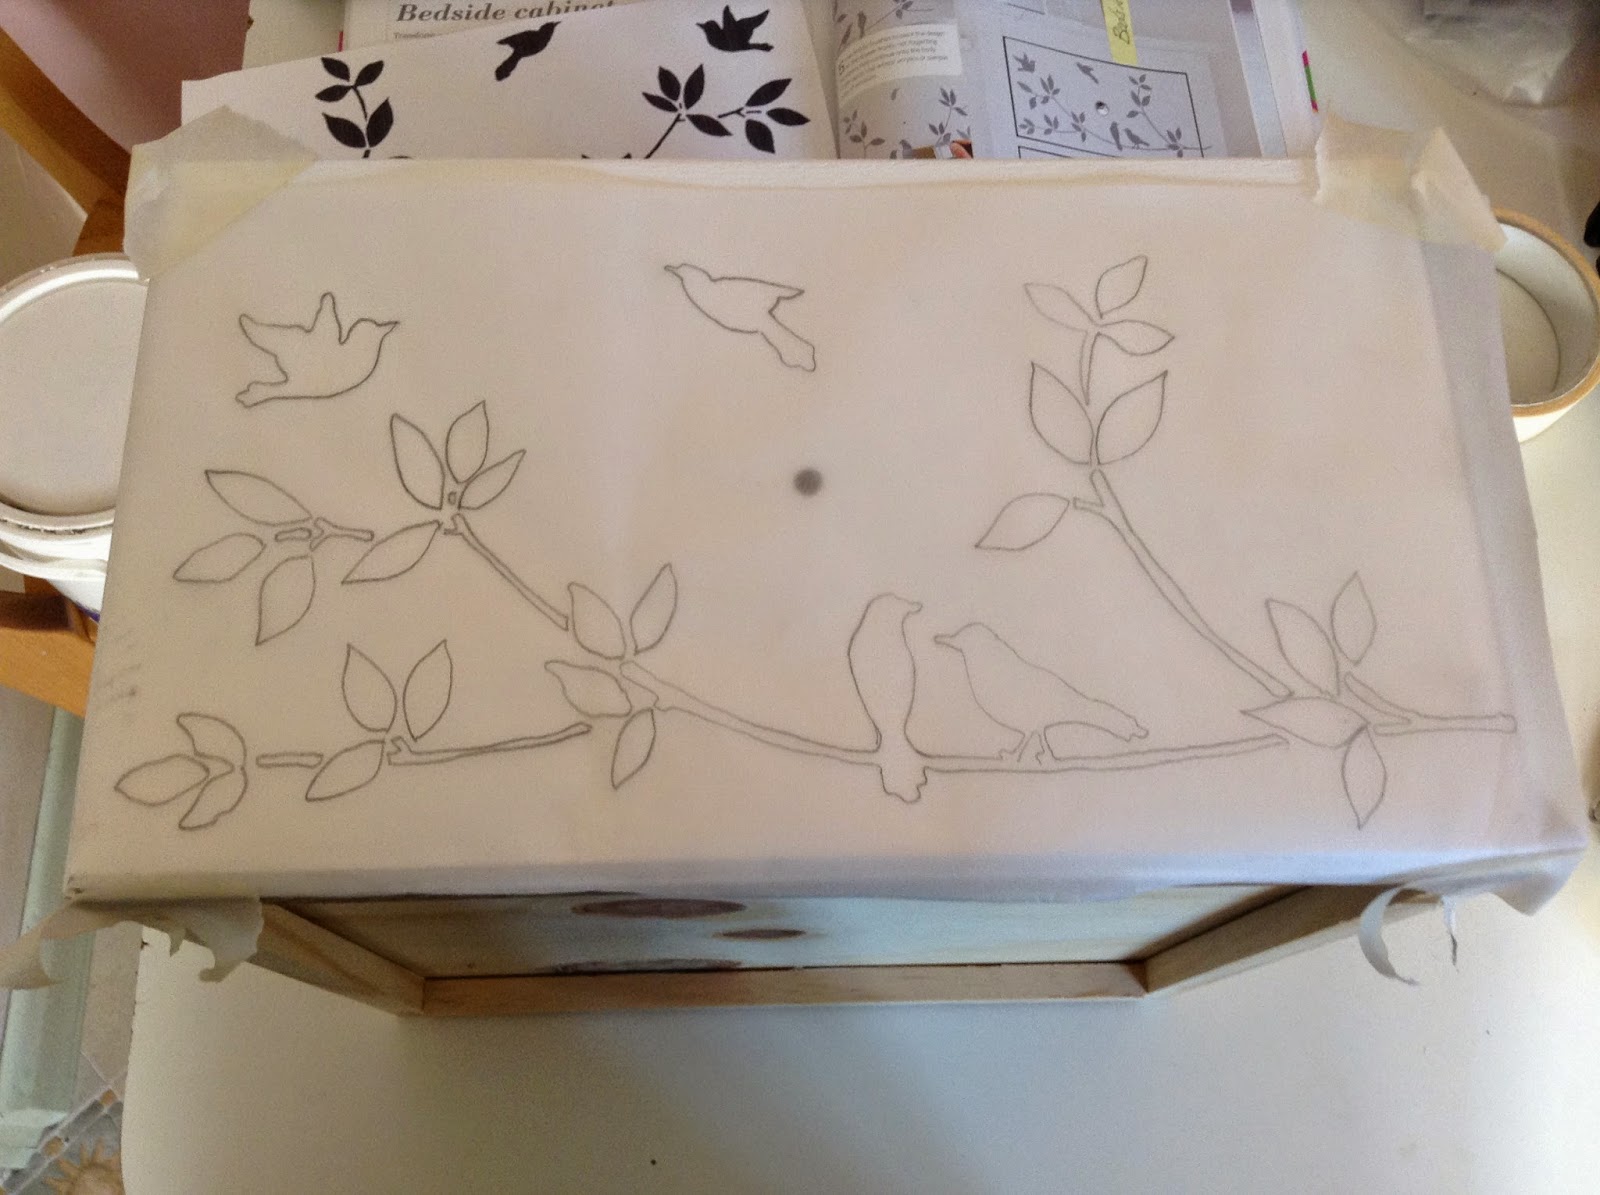

- For the other drawer, fix a piece of carbon paper over the face and draw your design on directly. This will give you a copy of your design that is the right way round. If you don't have carbon paper, you can use tracing paper and then flip and re-trace before transferring to give you the same design.


- Paint on the design, using as small a brush as possible (I used a cocktail stick for the very fine details), making sure you cover up any pencil lines.


- Spray or paint over one - two coats of clear acrylic varnish to protect the design. Replace the drawers. If you have used the design here, you can extend the stems slightly onto the body of the piece to make it more of a 'whole' - remember to varnish over this too.


Stained glass design
So, I'd hit upon some themes - purple, white and birds. Now everything had to conform to (at least one of) these. Hopefully the end result wasn't too creepy: I didn't want everything to look exactly the same. So I took the general idea and adapted it for this stained glass panel. (You can find the blog post for this technique here)
Design
Of course, I already had my subject, a bird. But the design is still important - you can refer to the other post for all of this, but basically when leading you don't want any really short, curved pieces (it's not flexible enough) and you don't want to be left with butted joins. This means your design should use as few, flowing and long, lines as possible. On the right I have colour coded the leading in application order, ensuring that where strips meet at a 'T' the 'stem' is tucked underneath the top:


Creation
(Reference the other post)
To create the design, I leaded one side of an A3 Perspex acrylic sheet, then cut out the paper shapes from my design. I then flipped these over to the reverse, and traced out the film. This was then stuck on the back of my leading, (third image). To complete the piece, I leaded over the film to give an identical appearance on both sides.


Lampshades
When my Dad (accidentally :D ) broke my lampshade, I took this as an opportunity to design and make one. And, of course, it had to fit with the colour theme! I chose an abstract purple wildflower pattern, printed on combed cotton so that the light could still shine through. The process involved cutting a strip of PVC backing and applying this to roughly cut fabric. I then trimmed this neatly and covered the two rings in double-sided sticky tape, which when rolled down the sides of the PVC formed the cube. I also made a matching pendant lampshade.


I looks so beautiful! And purple...
ReplyDelete